
Phillip Krzeminski recently returned from a year-long intensive scientific illustration program through Cal State at Monterey Bay, CA. Not many applicants are accepted each year and only someone with a high level of proficiency can get in. Phillip is one of those rare individuals. Some of Phillip’s artwork is featured on his website at:
Phillip stopped by my lab a couple of months ago and asked if he could help out doing something exhibit-related. I put Phillip to work on a model of a weasel for the Forest Margin diorama. I had removed the old, ratty, bug-eaten, taxidermied weasel from the diorama a while ago and Collin had scanned it for 3D printing.
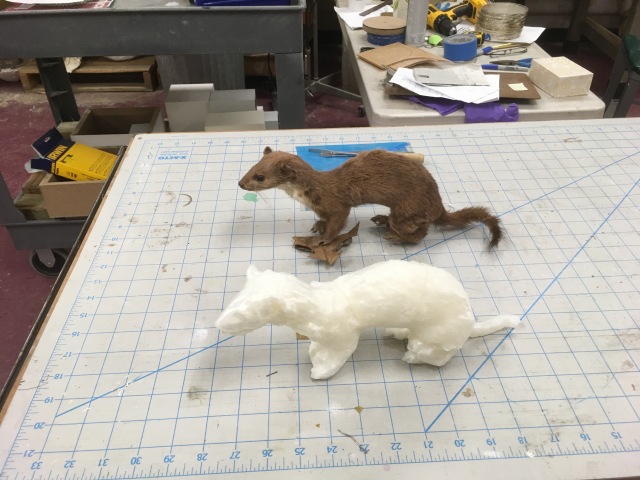
Phillip looked at the 3D print, noted all the additional artifacts of the printing process, and decided it would probably take less time to sculpt the model from scratch. Of course, that still took time to make sure all the measurements of bony landmarks were accurate. 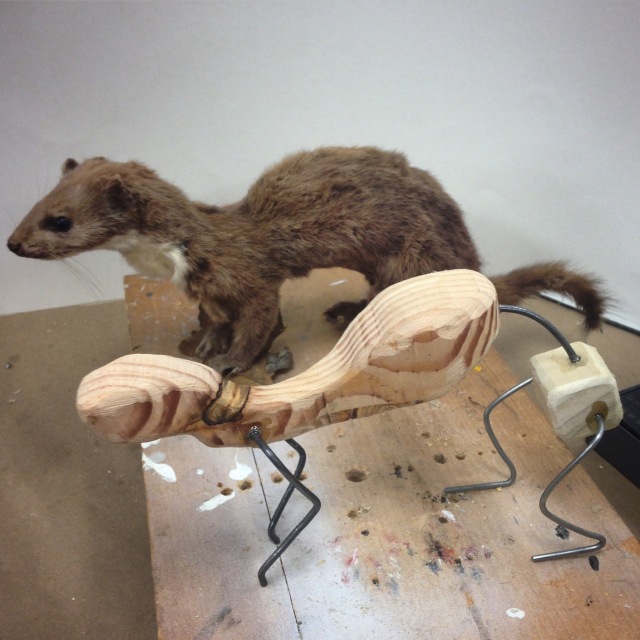 Once the armature was completed, a clay “gestural” model was sculpted. A plaster mold was made and a wax cast produced using the wood and wire armature. Phillip, started researching weasel musculature, of which he found only a few meagre references. There was one somewhat crude weasel reference online and he consulted the classic vertebrate anatomy guide: Miller’s Anatomy of the Dog. I also suggested he look at Antoine-Louis Barye, the French 19th century animal sculptor.
http://art.thewalters.org/browse/creator/antoine-louis-barye/
Barye combined anatomical accuracy with artistic power. He sometimes pushed the musculature to accentuate one area and he diminished other parts in the same sculpture to give the animal life. With the model muscled up, Phillip wondered whether he should add detail like claws that would barely be visible from the viewing window. I advised him not to worry about it, but he decided that he would invest the extra time to finish it off to that level. It turned out the claws made a big impact on the look of the finished model.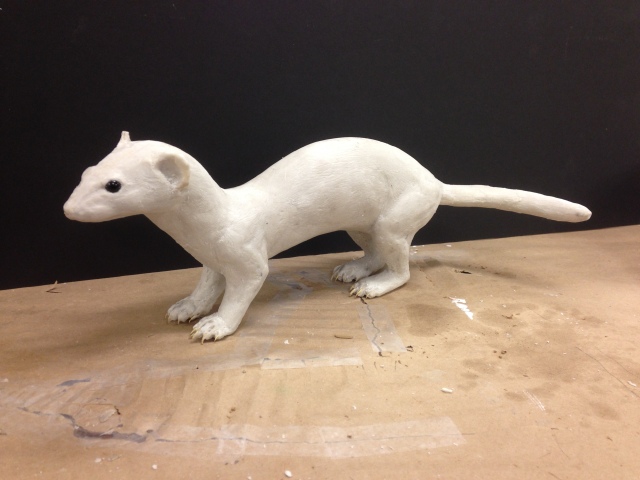
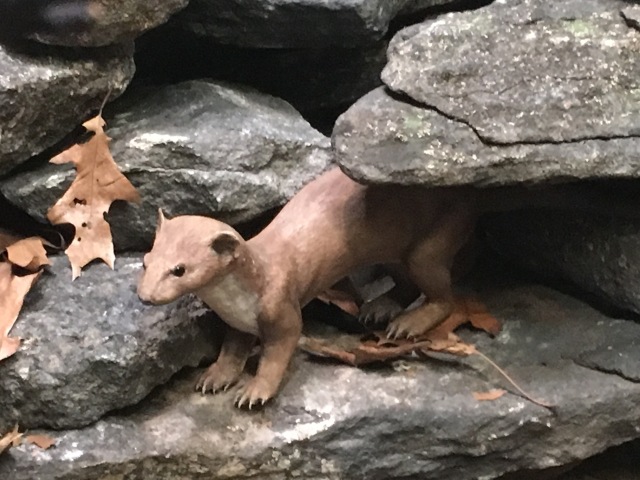
Phillip painted the wax model in acrylic paint and we installed it into it’s place in the diorama to see how it would look in the actual diorama lighting. We found that it was reflecting light unnaturally, so we removed it again, took it back to the lab and added dry pigment to the surface of the paint to knock down the reflectivity. It was then placed into position on the rock wall in the diorama.
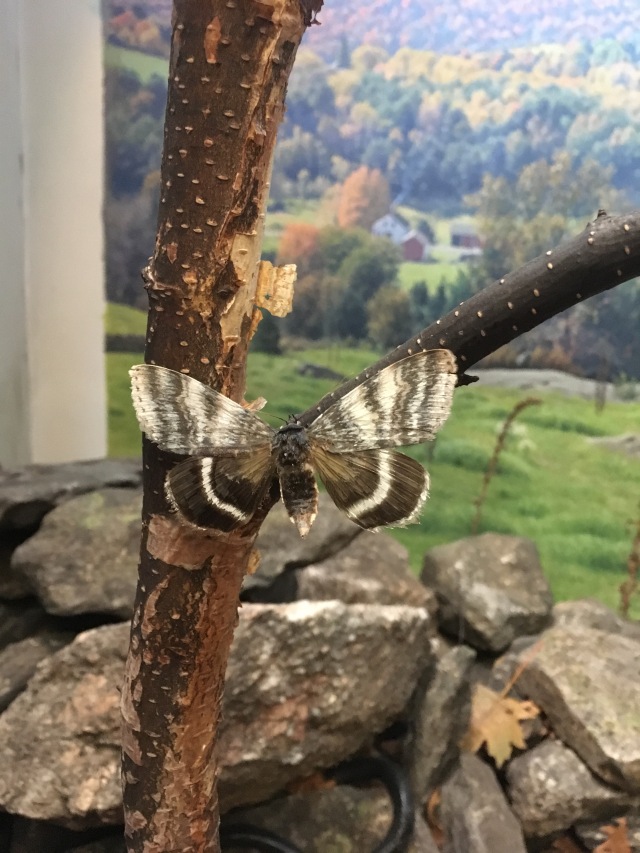
Also, while going in and out of the same diorama, I removed an underwing moth with a broken wing. There are two pairs of underwing moths in the Forest Margin, one dark and the other light. This was the light-phase moth with open wings (the other light-phase one has closed wings)
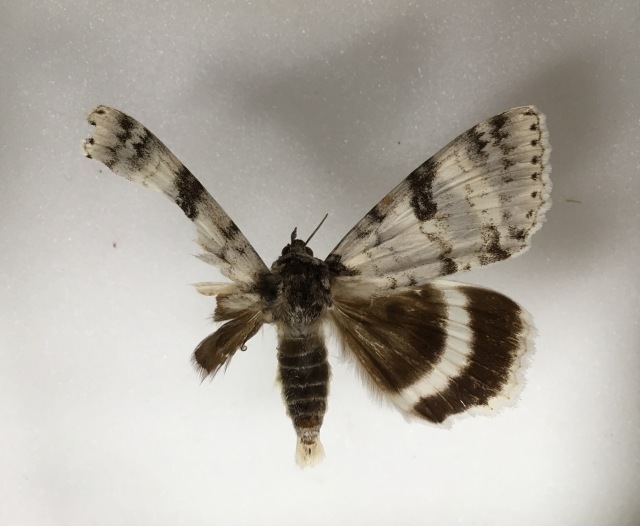
Keeping good examples of insects/invertebrates in the dioramas is an ongoing problem. I am trying to use models whenever possible, for example, replacing organic specimens of scorpions and centipedes in the Desert diorama with 3D printed replicas. (see previous blog entries) The underwing moths don’t fare well in the Forest Margin diorama. The dermestid beetle larvae love to eat them and I have to replace them every 2-3 years. In the Shoreline diorama, the label lists ants, hoverflies, earwigs, and a bumblebee that are supposed to be somewhere in the foreground, but I have never seen them (after studying the foreground this week, Nicole Palffy-Muhoray in Entomology found the two specimens of hoverflies on a beach pea.)
My mentor, Ralph Morrill told me that arsenic was painted on the surfaces of many insects, but the dermestids ate them anyway. It killed each dermestid that dined on them, but that only meant it took more dermestids to destroy an insect. I was asked recently by the entomologists if anything was ever sprayed on the insects to preserve them. I can’t remember Ralph or any other museum perparator ever mentioning it, but I would imagine, lacquer and other consolidants have been tried. That said, I suggested we try it anyway to see for ourselves. My assistant, Collin, took one of the new underwing specimens and sprayed Krylon Crystal Clear on it, soaking it thoroughly. Surprisingly, all four wings remained intact, but an unnatural glossiness was added to the surface and the upper wings, which started lighter than the lower ones, lost their lighter color and became indistinguishable from the lower ones. Collin tried to get it back to the previous lightness by adding light dry pigment to the upper wings . The dry pigment removed the sheen but didn’t restore the lighter color. Since the specimen wasn’t usable without the color difference, Collin tried painting the upper wings with acrylic paint to get the right balance of light and dark. Another surprise, it worked. We installed the lacquered, painted moth into the diorama.

I’ve really been enjoying these posts! The processes you use to create these creatures are amazing. It’s obvious that you all are extremely talented people, and I enjoy learning about your work. Keep posting!
Im curious how you discovered the blog. Im mostly doing this to remember what I do, but Im grateful to know others are reading it. My brain isn’t what it used to be!
I’m the same way; trying to follow a trail of breadcrumbs through the internet is a challenge! In this case, I follow the museum on FB. I believe they featured your work a couple of months ago. I followed the link to your blog, and signed up to be notified when you post. Nice work! BTW, I have a blog that focuses on natural history stories. They have all been published in newspapers and magazines around RI and parts of MA: http://www.scienceandnatureforapie.com .
Great! I’ll check out your stories!
Thanks! And I look forward to seeing your ongoing work.